Featuring a robust collection of editing options, ImBatch lets users customize and modify their images in hundreds of different ways. Whether you’re applying one filter at a time, or creating a complex multi-task build, there’s always something fun to be done with our batch image processor. As creative as some folks might be though, it’s helpful to see how some changes will appear before their actually made. With the help of the Preview Pane users can see how their images will look with different tasks applied to them.
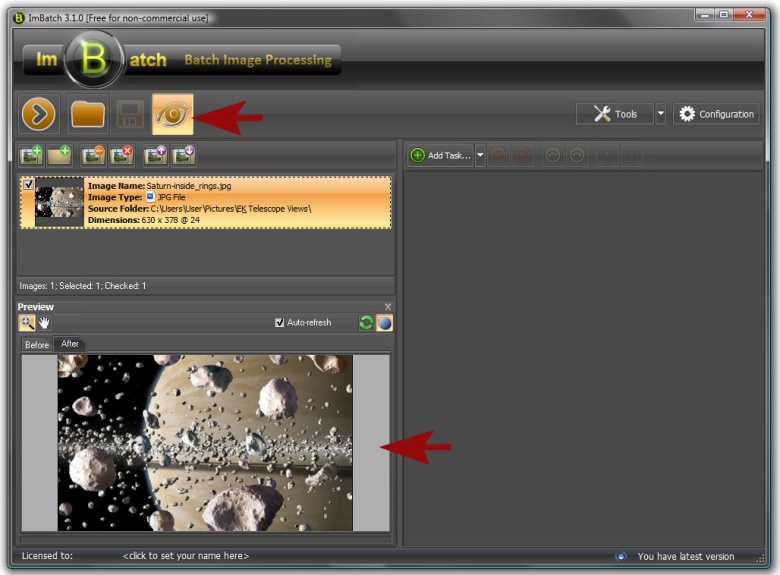
To see how this works, load an image into the ImBatch work space. With your image highlighted, click the eyeball icon in the top-left toolbar; this will open the Preview pane. The image will appear normal because we’ve yet to add any tasks that will act to modify it from its original state. To see the Preview feature in action, we’ll need to add a task or two.

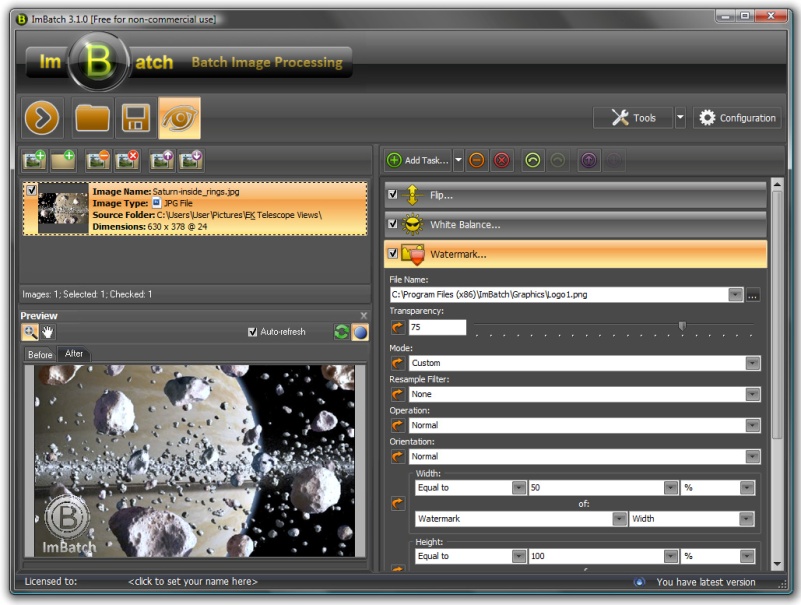
For demonstration purposes, let’s go ahead and flip the image horizontally, change the white balance, and add a watermark to the bottom left corner.

By clicking the Before and After tabs above the preview image, you can cycle back and forth between the new image and the original to get a better idea of just how much your image has actually changed!
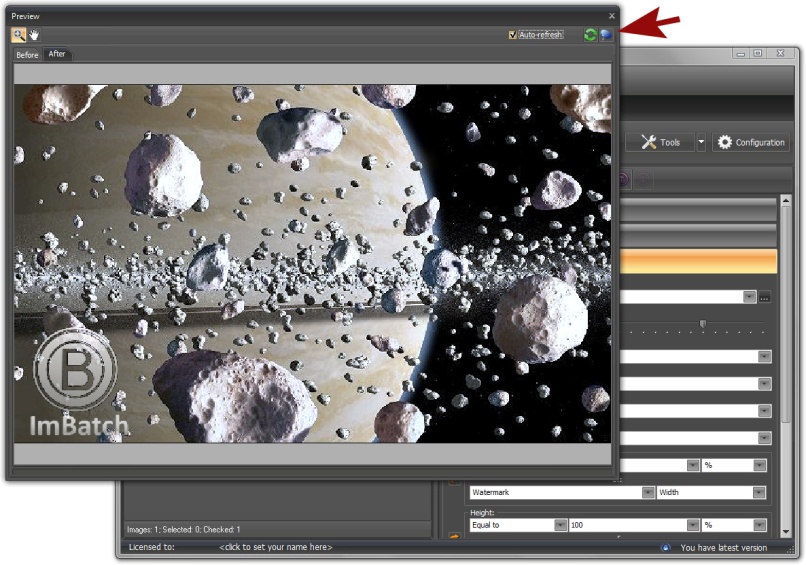
Another fun feature of the Preview pane is the ability to toggle docking mode. Click the small blue button that appears above the top-right corner of the Preview pane to enlarge your preview image and detach it from the main ImBatch interface.

All that’s needed to conveniently nestle your image back into the main interface is to click the Toggle button once again.
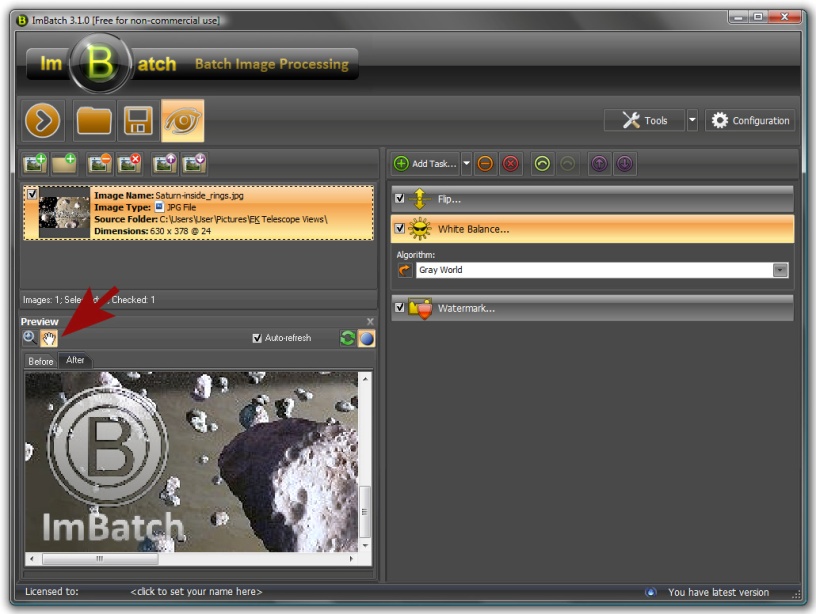
In order to view fine details close-up, click the Toggle into scroll mode icon; this will let you zoom in and out using your mouse wheel. When you’re ready, clicking the Automatically fit preview images icon will restore the preview window to its default resolution.

To learn more about ImBatch check out our how-to articles here.