Imagine how cool it would be to have access to a program that let you apply real-time changes to your images. Instead of having to sit there and modify them one at a time, such a program would do everything for you automatically; behind the scenes. If you’ve been looking for a tool like this, great news – your search is over!
With the assistance of the Image Monitoring feature, ImBatch users can specify which folders they’d like to keep an eye on. When new image files are added to any of the folders that are being monitored, ImBatch can automatically apply previously saved batch tasks. To begin taking advantage of this fantastic time-saving feature, simply configure ImBatch so that it knows where to look, and what to do.
Here’s how:
How-to Use the Image Monitor Feature in ImBatch
Step-by-step Instructions
- Begin by opening ImBatch.
- Next, click on the
 Tools button, followed by
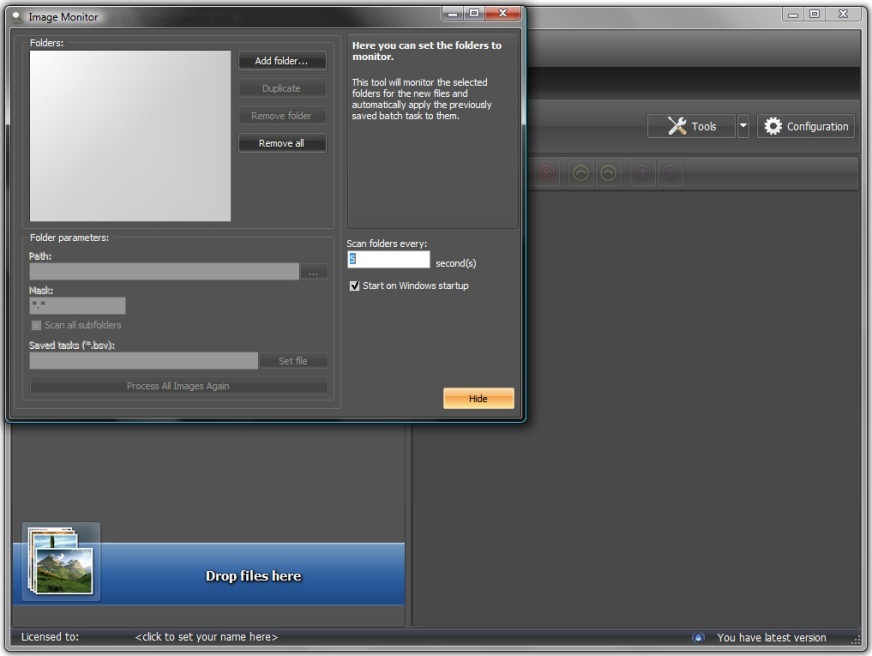
  Image Monitor. This will open the Image Monitor configuration interface.

-
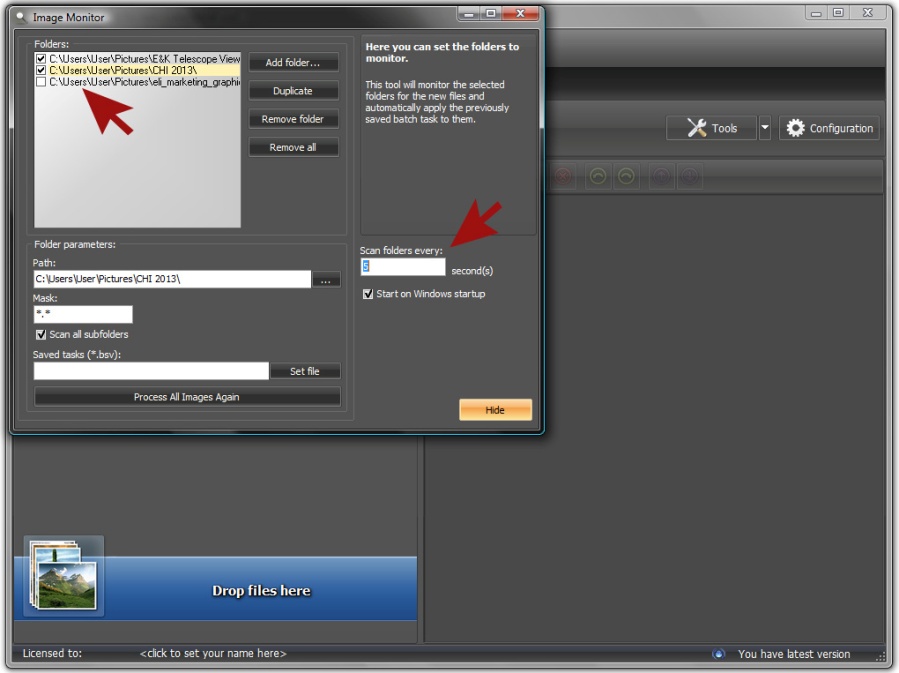
First, indicate which folders you want ImBatch to keep track of. Click the Add Folder button to begin creating a list of folders that you’d like to have monitored. Once all folders have been added, make sure that you check the empty box next to each folder pathway in the folders window. This feature lets you have multiple folders queued up at the same time, with the option to monitor just one, several, or all of them.
*Note: you can also have ImBatch monitor any smaller folders within these larger folders by checking the Scan all Subfolders box. It’s also possible to indicate the time interval at which you’d like to have ImBatch scan for new images. You can set this in intervals of seconds in the Scan folders every: field.

-
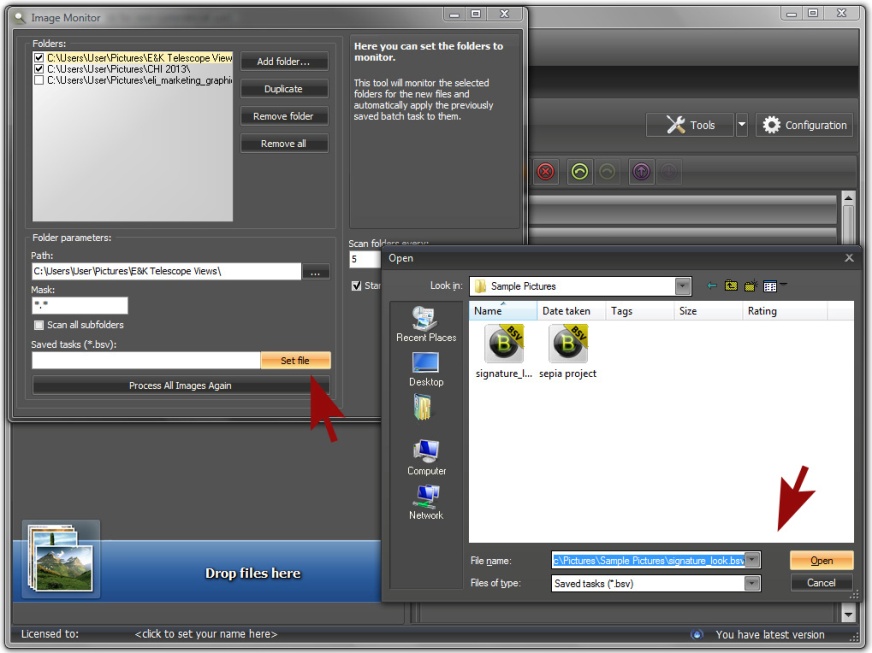
Next, if you’d like to use any task builds that have been saved from previous jobs, you’ll need to show ImBatch where those batch (*.bsv) files are saved. Click the Set file button to the left of the Saved tasks (*.bsv) text field. This will open a windowed view of your hard drive where you can select the files you want to associate with each folder. After you’ve selected the file, click the Open button.
*Note: clicking the down arrow to the right of the File name field will open a dropdown menu that is intuitively aware of the location of any and all preexisting (.bsv) files on your hard drive.

- You will need to repeat steps (3) and (4) for every folder that you plan on having ImBatch monitor as each folder references its own unique folder parameters independent of the others.
- When you’re ready, click the Process All Images Again button. This will not only process your tasks on demand, but lets ImBatch know that you are done making changes and ready to engage monitoring functions. Or you can click Hide> button to minimize the Monitor and start watching your folders.
- Due to the way in which ImBatch’s Image Monitor function works (and this is why Windows asks for your permission) the program will now be running silently in the background, keeping a watchful eye on the folders you have selected to be monitored. You can find Image Monitor icon in your system tray area.
