ImBatch lets you process lots of images all at once through its unique task building function. You can even tell it to monitor certain folders and perform tasks automatically. Now you may be thinking "hey that’s great, but I don't always want to perform the same task on every image." And you don’t have to! We've added a feature that lets you Filter images that don’t meet certain criteria, and ImBatch will just skip over them. To get started using the Filter feature, read on.
How to Add a Filter Task
Step-by-step instructions
- Begin by launching ImBatch.
-
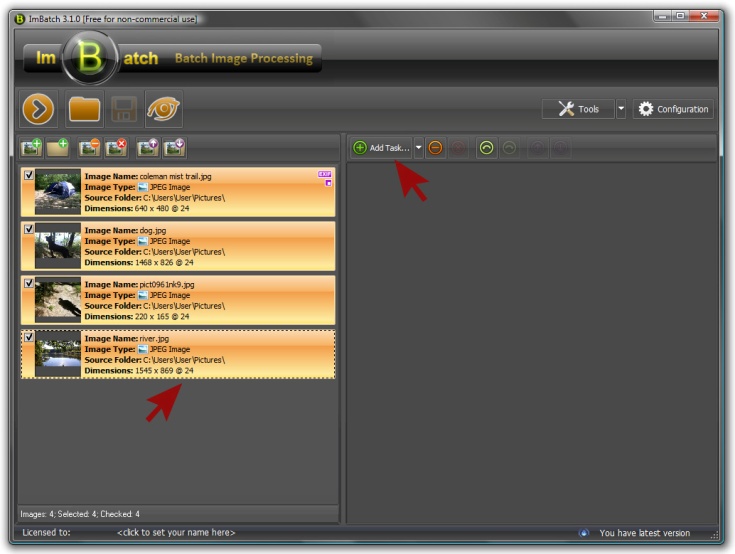
Next, load the images that you plan to work with. You can do this by clicking the
 Add new images for processing button or by dragging and dropping images into the work space located on the left side of your ImBatch window.
 - With your image(s) highlighted, click the
 Add Task button.

-
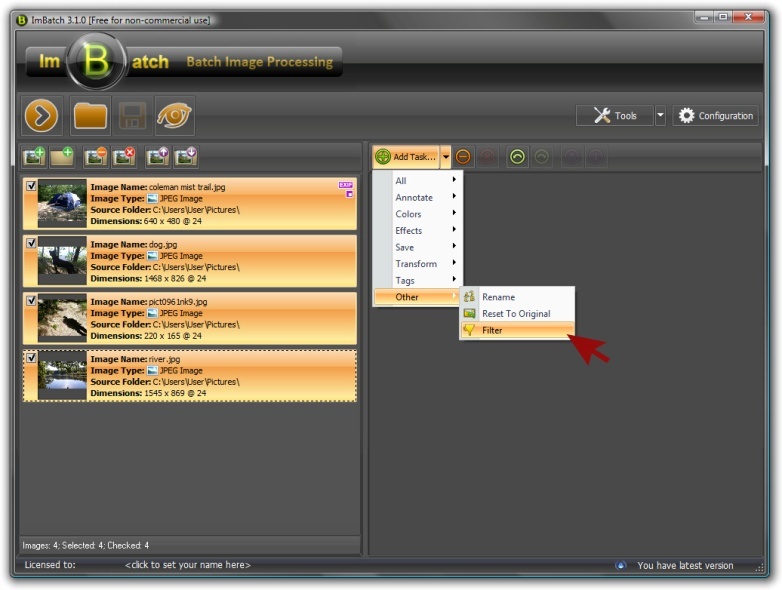
Scroll down to the bottom of the list and click Other. Next, you want to select
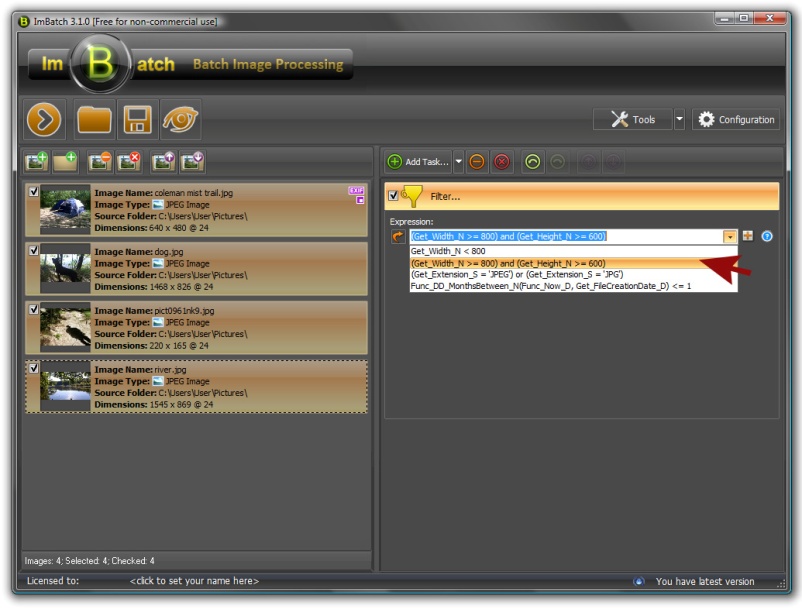
 Filter. Here you’ll see an Expression field where you can specify certain criteria that images will need to meet before ImBatch will auto-process them.

- For example, let’s tell ImBatch that we want it to ignore any image that is smaller than 800x600 pixels and only process those that are larger or equal 800x600 (only the images that match the condition in Expression field will be processed). To accomplish this, click the down arrow in the Expression field to reveal the premade examples. Select (Get_Width_N >= 800) and (Get_Height_N >= 600) from the menu. It’s as easy as that!

- To build more advanced functions and filters, clicking the
![[+]](/images/imbatch/button_add_attributes.png) button to the right of the Expression field will open a menu with lots and lots of options that can help differentiate your images based on whatever criteria you choose.
button to the right of the Expression field will open a menu with lots and lots of options that can help differentiate your images based on whatever criteria you choose. -
Once you’ve finished specifying which filters you’d like auto-applied to images that are added to folders that ImBatch is monitoring, you can initiate the task by clicking the
![[>]](/images/imbatch/button_run.png) Run batch image processing button in the top left toolbar.
Run batch image processing button in the top left toolbar.
For further explanations of how to build tasks, and pull everything together, check out our other how-to articles here.
